Friday, May 11, 2012

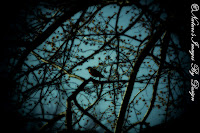
Interview with the Artist: Anita Miller, Winner of the April Art/Craft Contest!


1. Tell us about yourself 
I received my first camera when I was 12, from that moment my love of photography grew. I enjoy capturing just about anything that I can with my camera. For me, everything I see is a picture that is waiting to be captured. Sometimes, I see the photo as a story that is waiting to be told. Other times, I see the photo as a painting that is waiting to be created. I will spend any amount of time to trying capture the image as I have pictured it in my mind. I tend to lose myself completely when I am taking pictures. It is like my camera becomes extension/part of me and I think it is because of that, I am able to capture beautiful images. 

2. How would you describe your work?  
 If I were to use three words to describe my work, I would use dreamy, peaceful, and revealing.  Peaceful, because that is how I feel when I am taking the photographs.  Dreamy because I can see the image in my mind before I take the first picture.  I say revealing because through each picture that I take, I feel like I am revealing a little bit more of who I am.  When I am behind my camera, that is when I am most vulnerable.
3.  What is the inspiration behind your art? 
Nature inspires me, how everything changes from season to season.  I think that maybe it because everything is always changing that every image feels like it is the first picture I took.  I can spend hours taking pictures of the same subject matter in order to capture that one image or series of images that I have pictured in my mind before I started.
4. Who do you admire?  
Georgia O'Keefe, I love her nature images and how she captured trees in both living and dying phases.  Annie Griffiths, I love just about every image that she captures especially nature and travel photographs. 
5.  Where can we find your work?  
shop.naturesimagesbydesign.com <----IndieMade Store

Saturday, May 5, 2012

Feng Shui and Creativity


Hi, I'm Ingrid from GueGue Creations.  I have been fascinated with Feng Shui for many years.  A couple of years ago, I attended a weekend seminar at the New York Open Center.  It fueled my passion for Feng Shui!  In this first blog, I will explain what Feng Shui is and share  tips on how to enhance the creativity energy center of your home.  

Feng Shui is an ancient Chinese art and science which has existed for over 5,000 years.  It is described as "the Chinese art of placement and design."  The Chinese words Feng Shui means "wind" and "water".  In the Chinese culture wind and water are associated with good health; therefore, good Feng Shui means good fortune.  The flow of energy or "Chi" is the energy found inside and outside of your body.  It's quality affects your stress levels and performance.  The goal of Feng Shui is to create and attract the best Chi in your surroundings to support a good flow of Chi inside your body.  Feng Shui is not a decorating style, it's a principle that can be incorporated into any decor.  Feng Shui is a way of life, become aware of the energy that surrounds you and learn to follow and trust your gut instincts.

There are several schools of Feng Shui.  The one I'm most familiar with is the Black Sect School.  It uses the Bagua, a map consisting of 9 sections "guas" each represents an aspect of your life.  Each aspect of your life corresponds to an energy center within your home.  Below is a picture of a Bagua including all the energy centers.  Creativity/Children is the middle right.


The 9 centers of the Bagua:
Health and Well-Being - center
Love and Relationships - rear right
Career - front middle
Wealth and Prosperity - rear left
Family - middle left
Creativity and Children - middle right
Knowledge and Wisdom - front left
Fame and Reputation - rear middle
Helpful People - front right

The center for creativity is shared with children; creative thoughts are ideas waiting to be given birth to.

First, draw a simple overhead sketch of the floor plan of your home to identify it's shape.  Include all areas with roofs and sides that are attached to the main structure.  Now, divide it into 9 equal parts as above.   In order to locate the 9 energy centers, you will now superimpose the Bagua onto the floor plan.   The front door of your home determines the placement of the Bagua.  Lay the Bagua on top of the sketch of your home so that the front door is in Knowledge and Wisdom, Career or Helpful People. These 3 centers will always be at the bottom of your drawing.  Once you locate which center your front door opens into; the rest are easy to find.  *If your home is large, one center may include 2 or 3 rooms.  If your home is small, you may find 3 centers in one room.  You may also find missing energy centers in your floor plan; don't worry, it can be remedied.


Enhance your Creative and Children energy center to:
Achieve success on creative projects
Remove creative blocks
Conceive
Increase your child's learning skills
Improve the relationship between yourself and your child

Negative Symbols that must be removed from this energy center:
Objects representing creative mishaps
Pictures of people who don't believe or support your creative projects
Your child's unsuccessful projects
Remove all Clutter!  Clutter exist in physical and emotional form.  If unpleasant memories come to   mind when you look at an object, It is emotional clutter.  Get rid of it.

Enhancements:  (add underlined enhancers immediately)
Healthy plants
Lamps or Light sources
Metal picture frames, candle holders and electronic equipments
White items and pastels as accents
Childlike toys (if you want to encourage a pregnancy)
Arts and craft supplies
Music and musical instruments
Environmental anchors for creativity - prints of a favorite artist, sculptor, poetry, handmade arts and crafts
Baby items (if you want to encourage a pregnancy)
Your child's artwork, good report cards, drawings, and projects (to increase your child's learning skills and creativity)

Once you have enhanced the main creative energy center of your home, you can use the Bagua to locate and enhance the creative center in every room of your home.  The bagua can be applied to every space and flat surface (desktop, nightstand, dresser etc)

Have fun Feng Shui'ing!

To visit my online jewelry shop, go to:
www.gueguecreations.etsy.com

References:  Feng Shui your life, Jayme Barrett  


Sunday, April 29, 2012

Crafty Tips

Nicole from Free Bitch Crafts and Gifts here and reporting for duty!


No one likes doing things the hard way (well, at least I don't!) so I am always on the lookout for little tips to make things go a bit more smoothly. Here is a list of some of my favorite tips:

  1. Free online tutorials. If you want to try something but don't really know how to go about getting started, there is a free tutorial or pattern for it. A great place to find some unique patterns and tutorials is Free Pattern
  2. Invest in a well organized storage unit. Knowing where that specific color thread or fire polished bead can make or break a project. Don't gamble with perfection. Stay organized. Michaels often holds 50% off storage item promotions. Other great places to find cheap storage containers are Target and Walmart
  3. Join Michaels Rewards program. Get exclusive sales, coupons, and crafting tips and ideas as soon as you sign up. Accumulate points to reach the Gold status to save even more. The best part? IT'S FREE!
  4. Start a blog. Blogging is a great way to meet other crafters who have a wealth of information. Blogging is also a great way to make sure you stay on target with your goals and keep track of your progress. Tip Junkie has some great tips for helping you blog.
  5. Invest in quality supplies. When you are starting out, the cheapest option might seem like the best idea. IT'S NOT! For a couple of bucks more, you can invest in some high quality tools that LAST. Many even come with a lifetime warranty where companies will repair or replace damaged tools due to natural wear. Now, this doesn't mean you should blow all of your savings on top of the line tools, especially if you don't feel like you're going to stick with it. Buy the tools that fit your needs, not the tools that just barely got the job done.
  6. Lastly, HAVE FUN!!! If it's not fun or fulfilling, try a different method out. Don't force yourself to do something you don't like, especially if you feel lie you've bitten off more than you can chew. Take a deep breathe and analyze the situation.


Saturday, April 7, 2012

This year's eggs — a little more subtle

April 7, 2012
Here are the finished eggs, after about 24 hours in their natural dye immersions as described in this post yesterday.

Just as I suspected when I had already prepared the dyes and then went back and read my own blog posts from previous years (see 2011 here and 2007 here), I should have increased the quantity of the vegetable matter because I was coloring three eggs in each mixture instead of just one.

Even so, there is something to be said for subtle coloration, too. Right?

Turmeric seems to always stain a reliable golden yellow, no matter how much (or little) you use.

The blue eggs are from red cabbage, and if you check the 2011 photo at the top of yesterday's blog post, you'll see that it can create a pretty intense blue.

The third color, new for me this year,  is that mauve, which came from grated red beet. I had hoped for a clearer pink or even a magenta, and I might have gotten a more intense color had I increased the amount of grated beet, or even if I had used a different kind of beet.

But the experimenting is really half the fun, isn't it? I mean, who wants boring predictable results? You can get that by buying plastic eggs!

So, what's next? Deviled eggs, of course! My grandmother used to color the whites after cutting the eggs in half to make deviled eggs, and since I saved the liquids from the egg dyeing, I just might be up for another experiment. Stay tuned, because of course I'll share the results here.

Natural Egg Dyeing

By Sharon Parker
ArtyDidact

2011 eggs, colored with turmeric (yellow) and red cabbage (blue)

For the last few years, I've been coloring eggs for Easter with natural dyes that use ordinary foods you may already have in your kitchen, or certainly could find easily at any grocery store. I've continued to do it after my first experimental efforts because it's just really satisfying to be able to thumb my nose at the product industries that want us to think we can't make anything in the kitchen that doesn't come out of a package.

It's really quite simple. In fact, I'm not convinced that mixing those little cups of commercial dye is any easier. It's just faster. Natural-dyed Easter eggs need to sit for several hours, and I've taken to letting them sit in the refrigerator overnight for best effect.

Grated beets, for pink eggs
I use the chart and instructions provided by Lakewinds Co-op (which you will find here). I figured out a few years ago that the amounts given in the chart are for coloring one egg, so you'll want to increase them proportionately if you're dyeing more eggs. Unfortunately, I didn't look at my notes until after I finished, so this year's batch might be a little more pastel than last year's.

The three colors I'm going for this year are saffron yellow (from turmeric), robin's egg blue (from red cabbage), and pink (from beets). I put the chopped or shredded vegetable or powdered spice in a wide-mouth quart jar, added a teaspoon of white vinegar, put in a little boiling water and stirred it, then added the already-cooked eggs and more water to cover.

And that's it. Now let 'em sit. I do stir them from time to time (a chopstick works well for this) to distribute the vegetable matter. But I don't worry about it too much, because some color variation is interesting anyway, right?

You can see how this year's eggs turned out here.

Now, if you don't like to waste food, you may wonder, what about the rest of that beet and the red cabbage?

This year's eggs, ready to set overnight
The red cabbage makes a very pretty cole slaw, especially when you add a grated carrot. Just dress it with a slightly sweet vinaigrette, because a creamy mayonnaise-based dressing will turn a little too pink!

I like to make a dressing with 2/3 or so olive oil and 1/3 balsamic vinegar, measuring a combined total of 1/4 cup, then add about 1/4 tsp kosher sea salt and a tsp. maple syrup. Maple syrup is great because it dissolves in cold liquids without congealing or tons of stirring.

Red cabbage and carrot cole slaw in the back, beet and cucumber salad to the front.
The beet I diced into small pieces and tossed with some diced cucumber in more of that light vinaigrette dressing. Yum!

Saturday, March 31, 2012

Welcome to The Creative Collective!

Hi, and welcome to The Creative Collective!

We're a group of artists & crafters who met through our individual shops on Etsy.  This blog, along with our Facebook Page, were created out of a desire to help each other flourish & gain recognition as well as to attract  & showcase some of the truly beautiful handcrafted work other artists are creating.

Nine artists comprise and administrate the Creative Collective so far.  We may consider adding more later, but for now while we iron out the wrinkles and get comfortable in this venture, nine seems like a good manageable number.  The links to our individual shops and/or websites are in the right hand column and you can click HERE to read a short bio about each of us.

I'm Jak, and I'm the captain of this group, but there's very little steering to be done on my part.  All of us share equally as admins on our Facebook Page, and although I'm writing this first blog, you'll see each Creative Collective member contributing blog articles along the way.  Maybe you'll read about one of our favorite coffee shops, or our favorite recipes.  Another member may share a relaxing bike ride to visit a museum.  Or maybe someone will try to explain why they think art is so important in life and what compels them to create.  We also hope to feature occasional guest artists and guest bloggers here as well.  There's no formula for this, so we're just going to show you the things we do and love and hope that you like them too.

We're going to kick off our Fan Page grand opening with a couple of ideas we had that we hope will really WOW you.  First, for a limited time, our new fans will receive 10% off of purchases in any of our shops.  Just visit our shops, choose your favorite items, and enter promo code CCGO10 at checkout.  You can see samples of our work with links to our shops in the photo section of our fan page.  This offer will expire on April 30, 2011 and is only offered to fans of our page, so be sure to LIKE us when you visit.

AND....  (drumroll please!)

We're going to have a CONTEST for you fellow artists out there!  If you create, you can enter.  We think this is one way cool gnarly idea, so read on for how to participate...

Submit ONE photo that you think best represents your work to TheCre8tiveCollective@gmail.com no later than midnight on April 14, 2012.  Use APRIL CC CONTEST ENTRY as your subject line.  We will post all entries into an album on The Creative Collective Facebook fan page and voting will begin.  Votes will be the number of fans who LIKE the image, and the photo with the most LIKES when the contest ends on May 5th, 2012 will be the winner.  The winning artist will have their work featured in our next blog.

Entries for the contest start NOW!  Be sure to share us with your friends and ask them to LIKE us so they'll be ready to vote once the photos are posted.

Click here to visit The Creative Collective on Facebook.

Thank you so much for checking us out!

~CPN JAK